
Create your organization (workspace) in Alano
An organization in Alano is your shared workspace where you collaborate with teammates, manage deals, contacts, tasks, and configure AI settings.
On this page
You can create multiple organizations under one account.
Step 1: Open the organization switcher
From your dashboard:
-
Look at the top-left corner
-
Click your current workspace name (e.g. Louie’s Space)
-
Select Manage Organizations
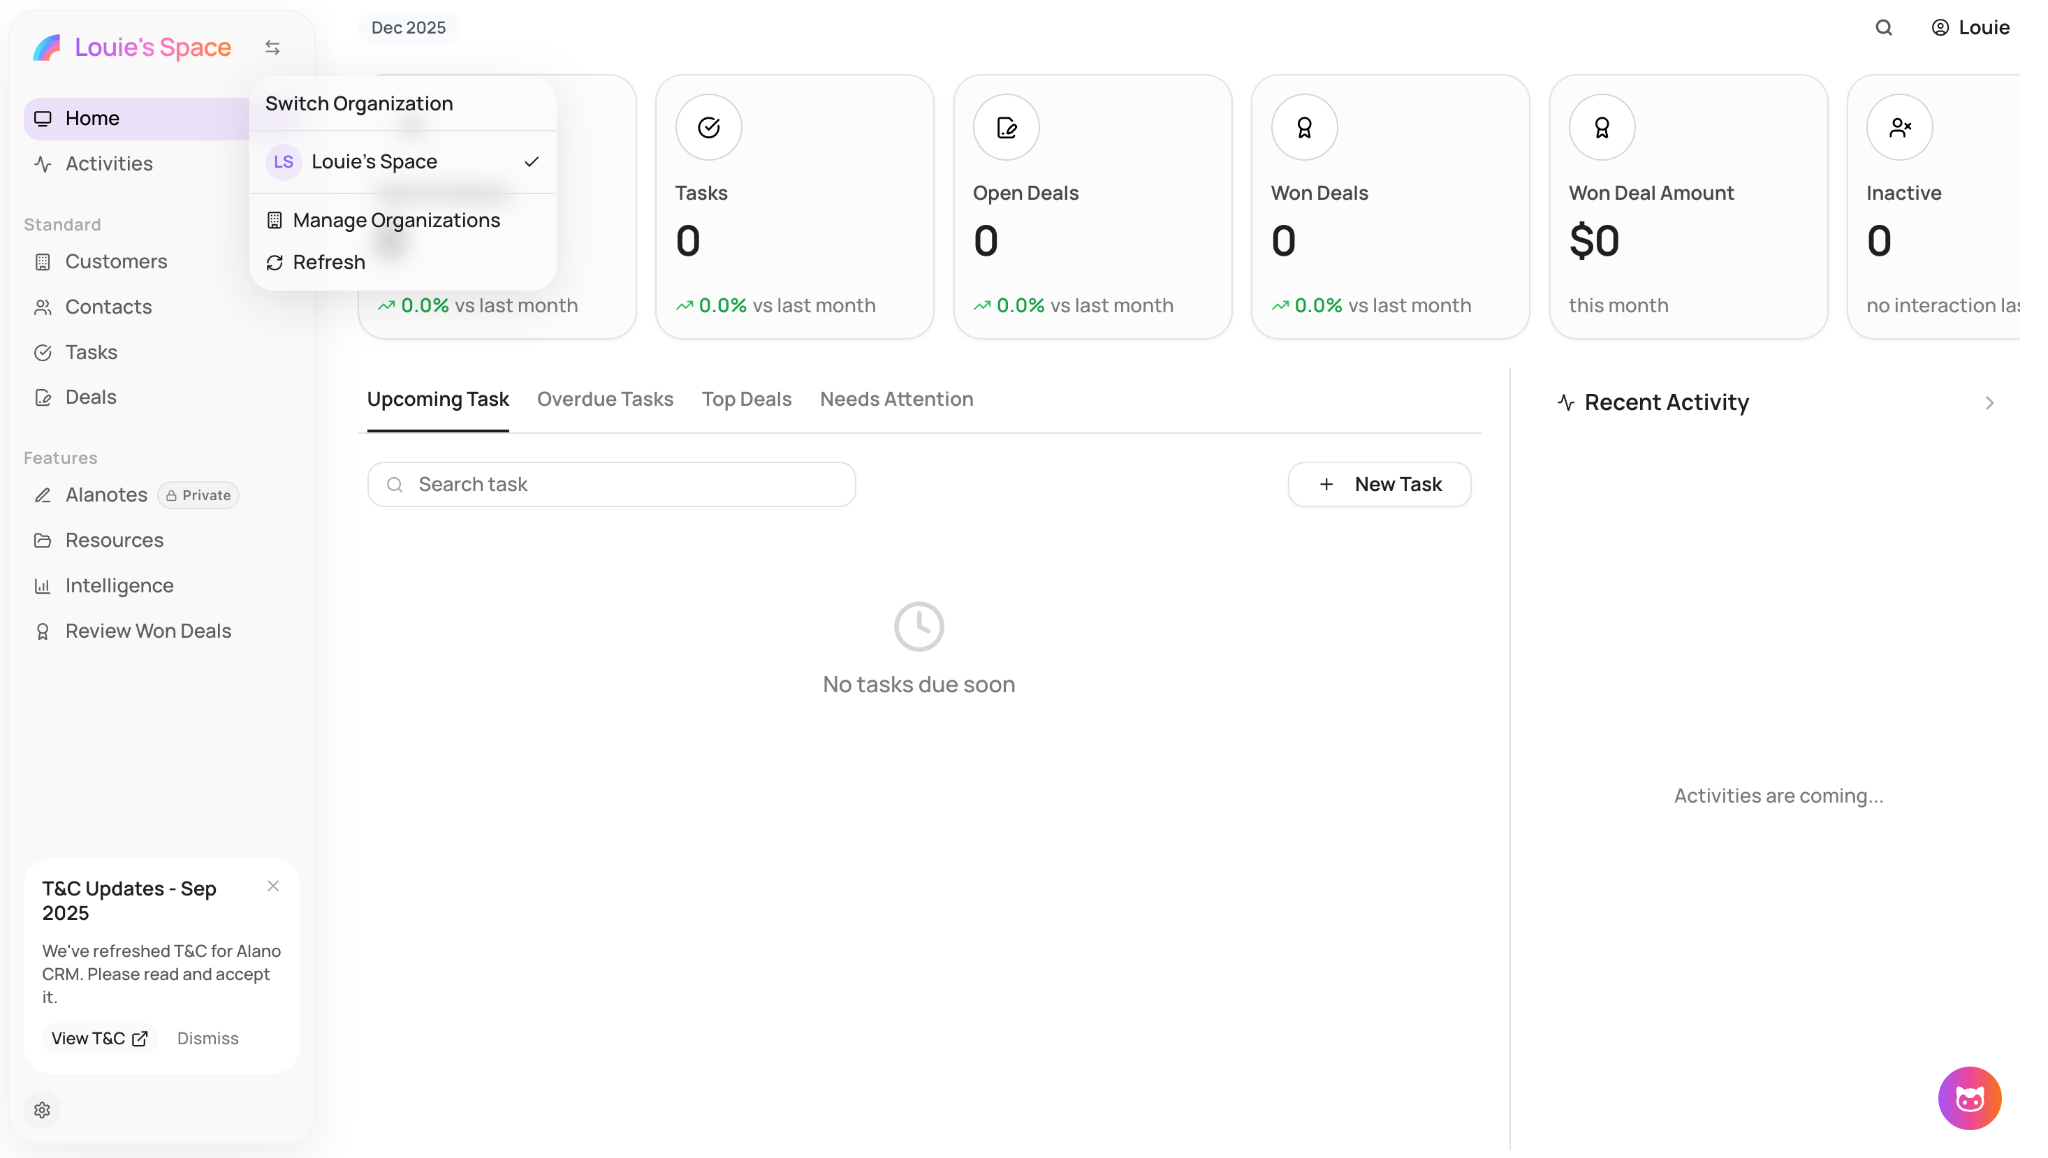
This will take you to your organization management page.
Step 2: Create a new organization
On the Your Organizations screen:
- Click Create New Organization
A setup modal will appear
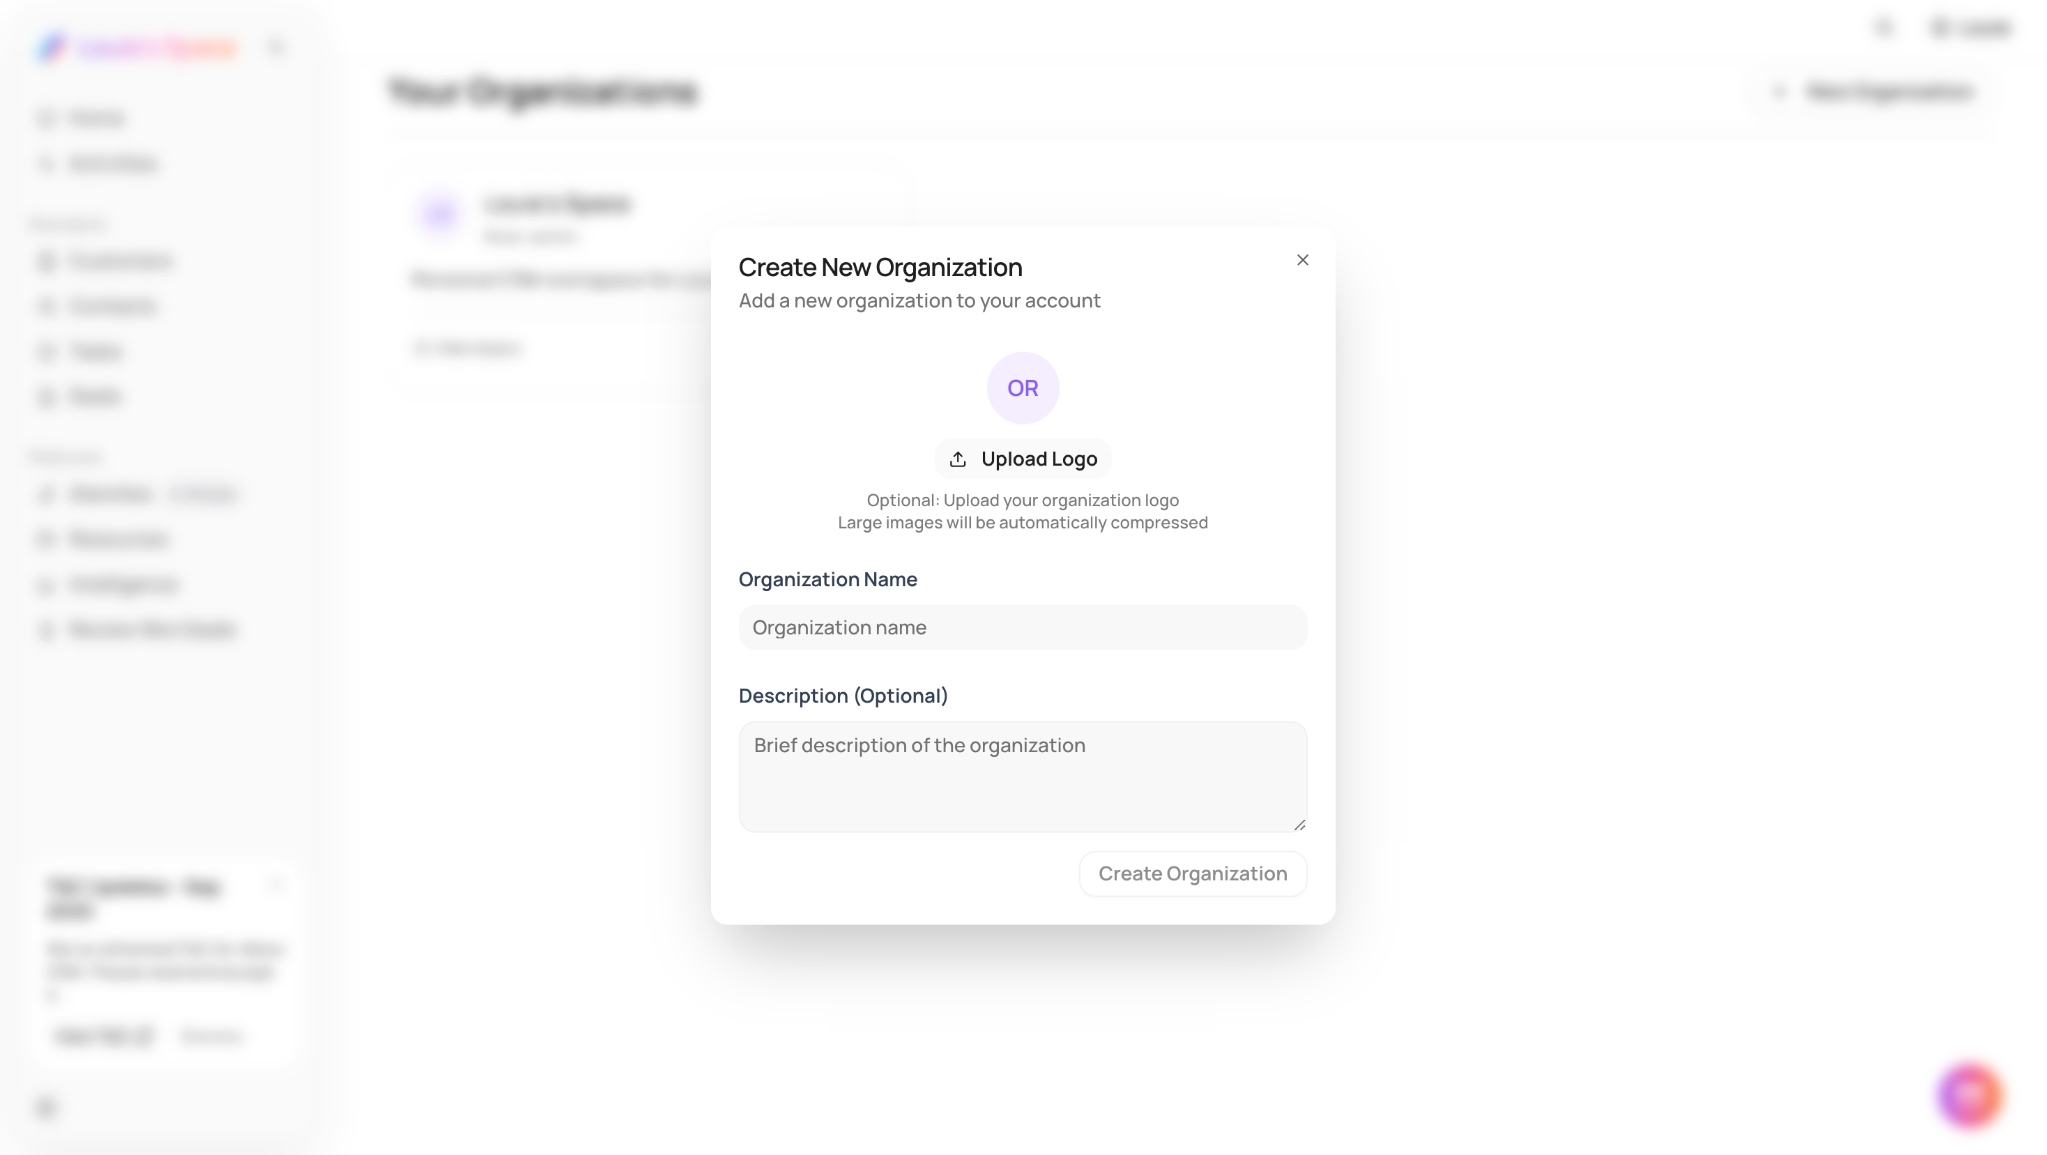
In the Create New Organization modal:
-
Upload logo (optional)
Add your company or team logo.
Large images will be automatically compressed. -
Organization name
Example:
Alano Sales Team
Acme Ltd.
Marketing Workspace -
Description (optional)
A short description to help your team understand the workspace purpose. -
Once done, click Create Organization.
Step 3: Access organization settings
After creating the organization, you’ll be redirected to your workspace.
To manage it:
-
Click your profile icon (top right)
-
Select Settings
-
Under Admin Tools, click Organization Settings
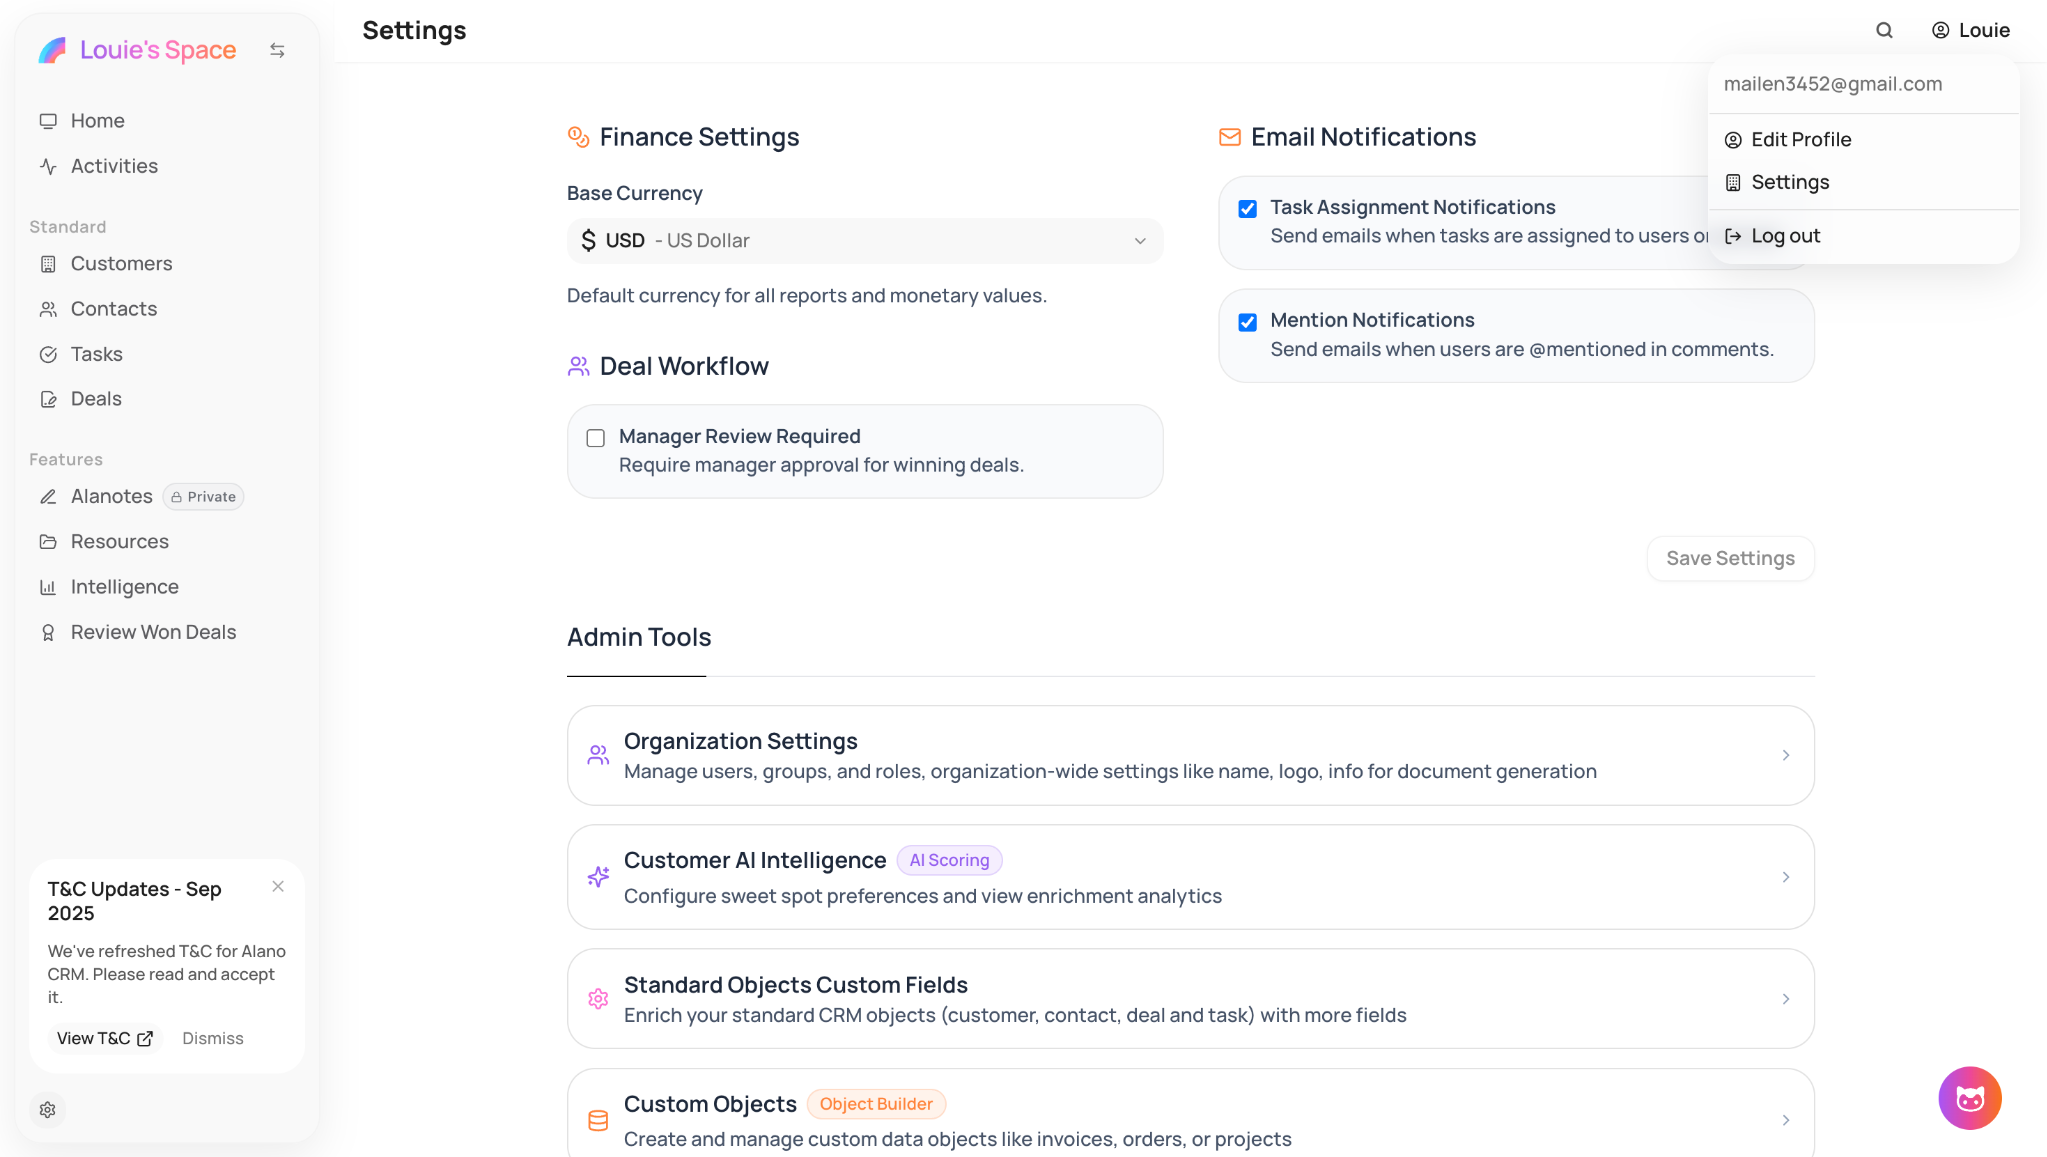
Here you can configure:
-
Organization name & logo
-
Users, roles, and permissions
-
AI preferences
-
Custom objects and fields
-
Company info for documents
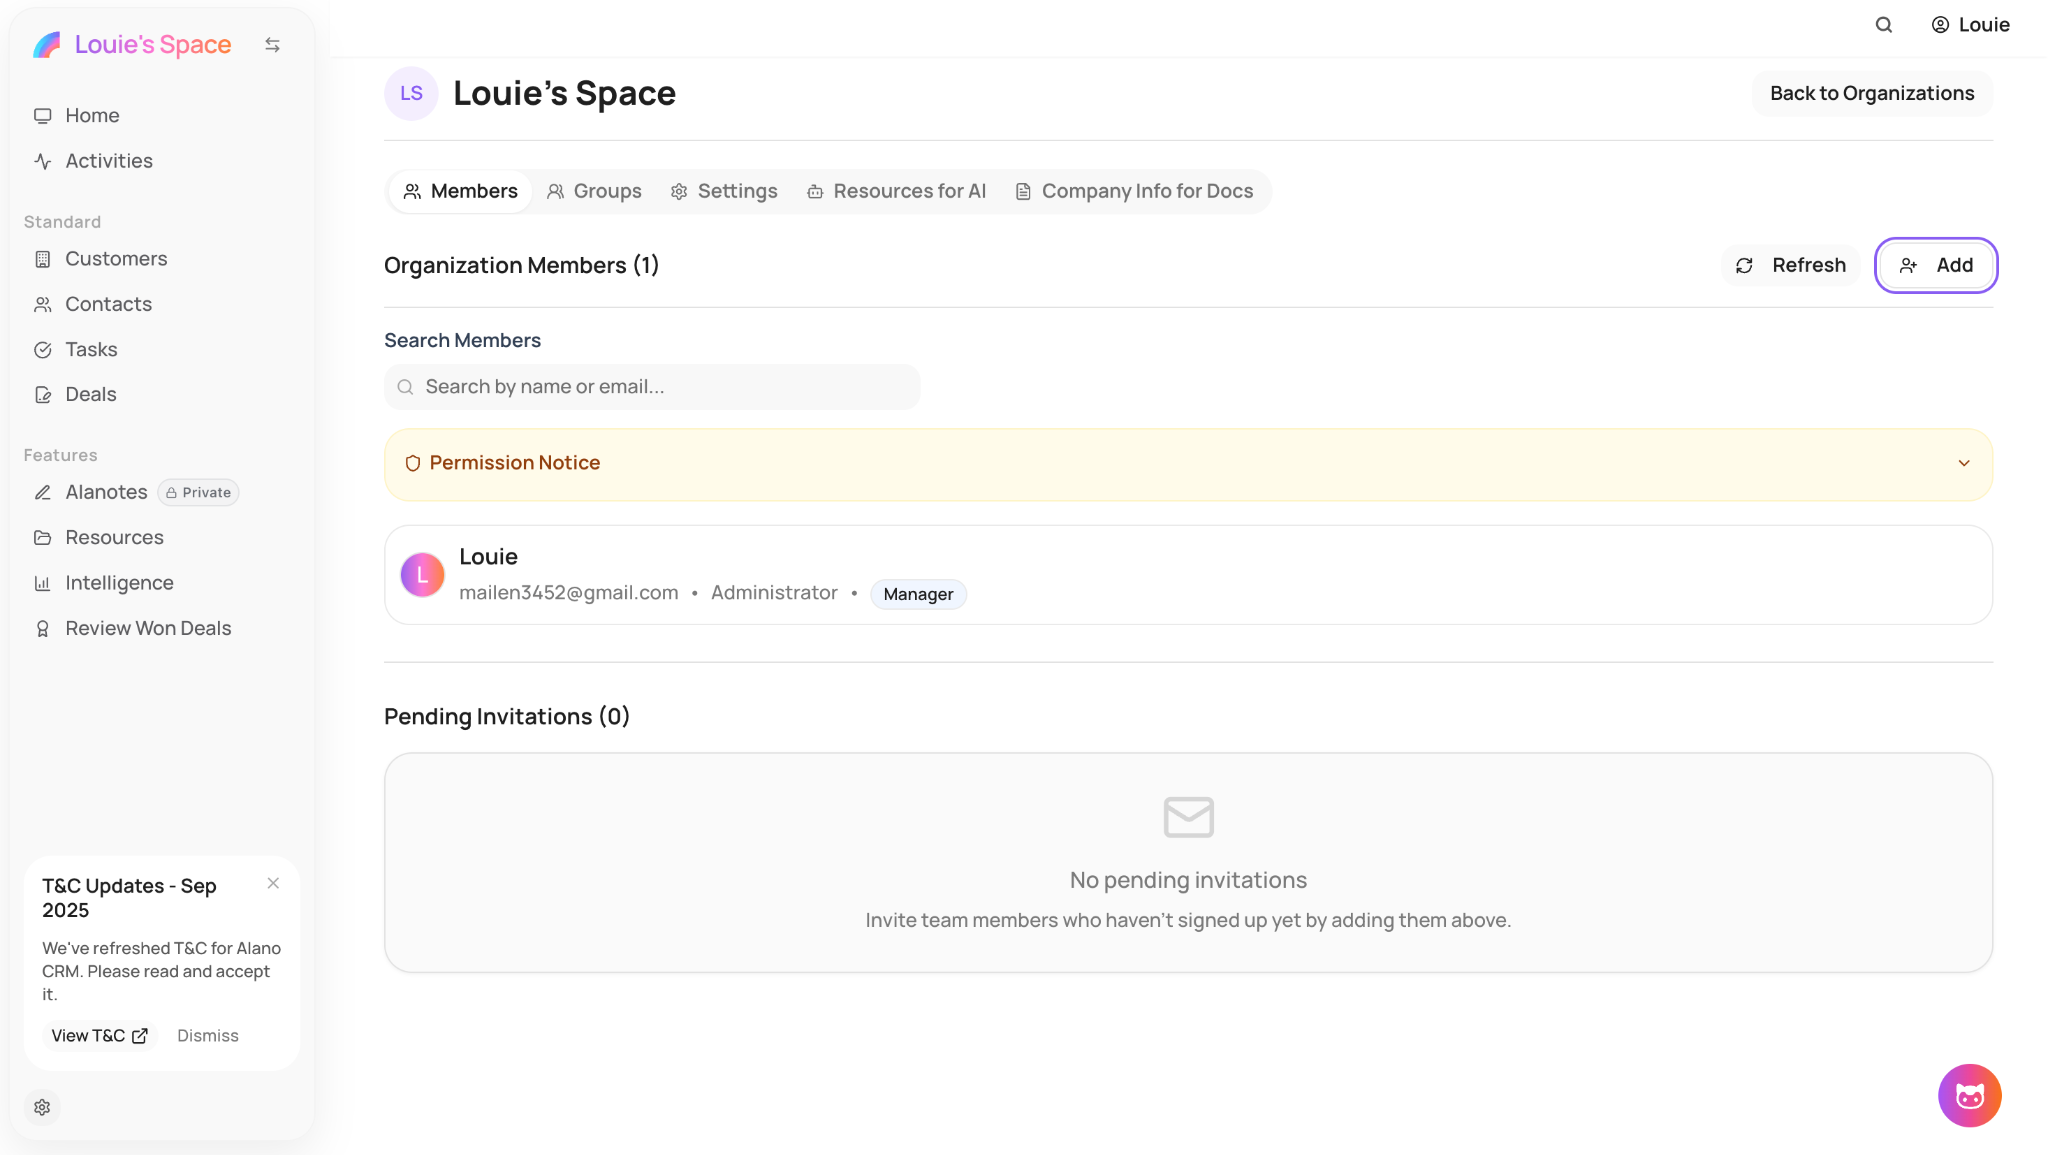
Step 4: Invite team members to your organization
Inside Organization Settings → Members:
-
Click Add
-
Enter the teammate’s email address
-
Alano supports two cases automatically:
-
Existing Alano users → added instantly
-
New users → receive an invite email and join once they sign up
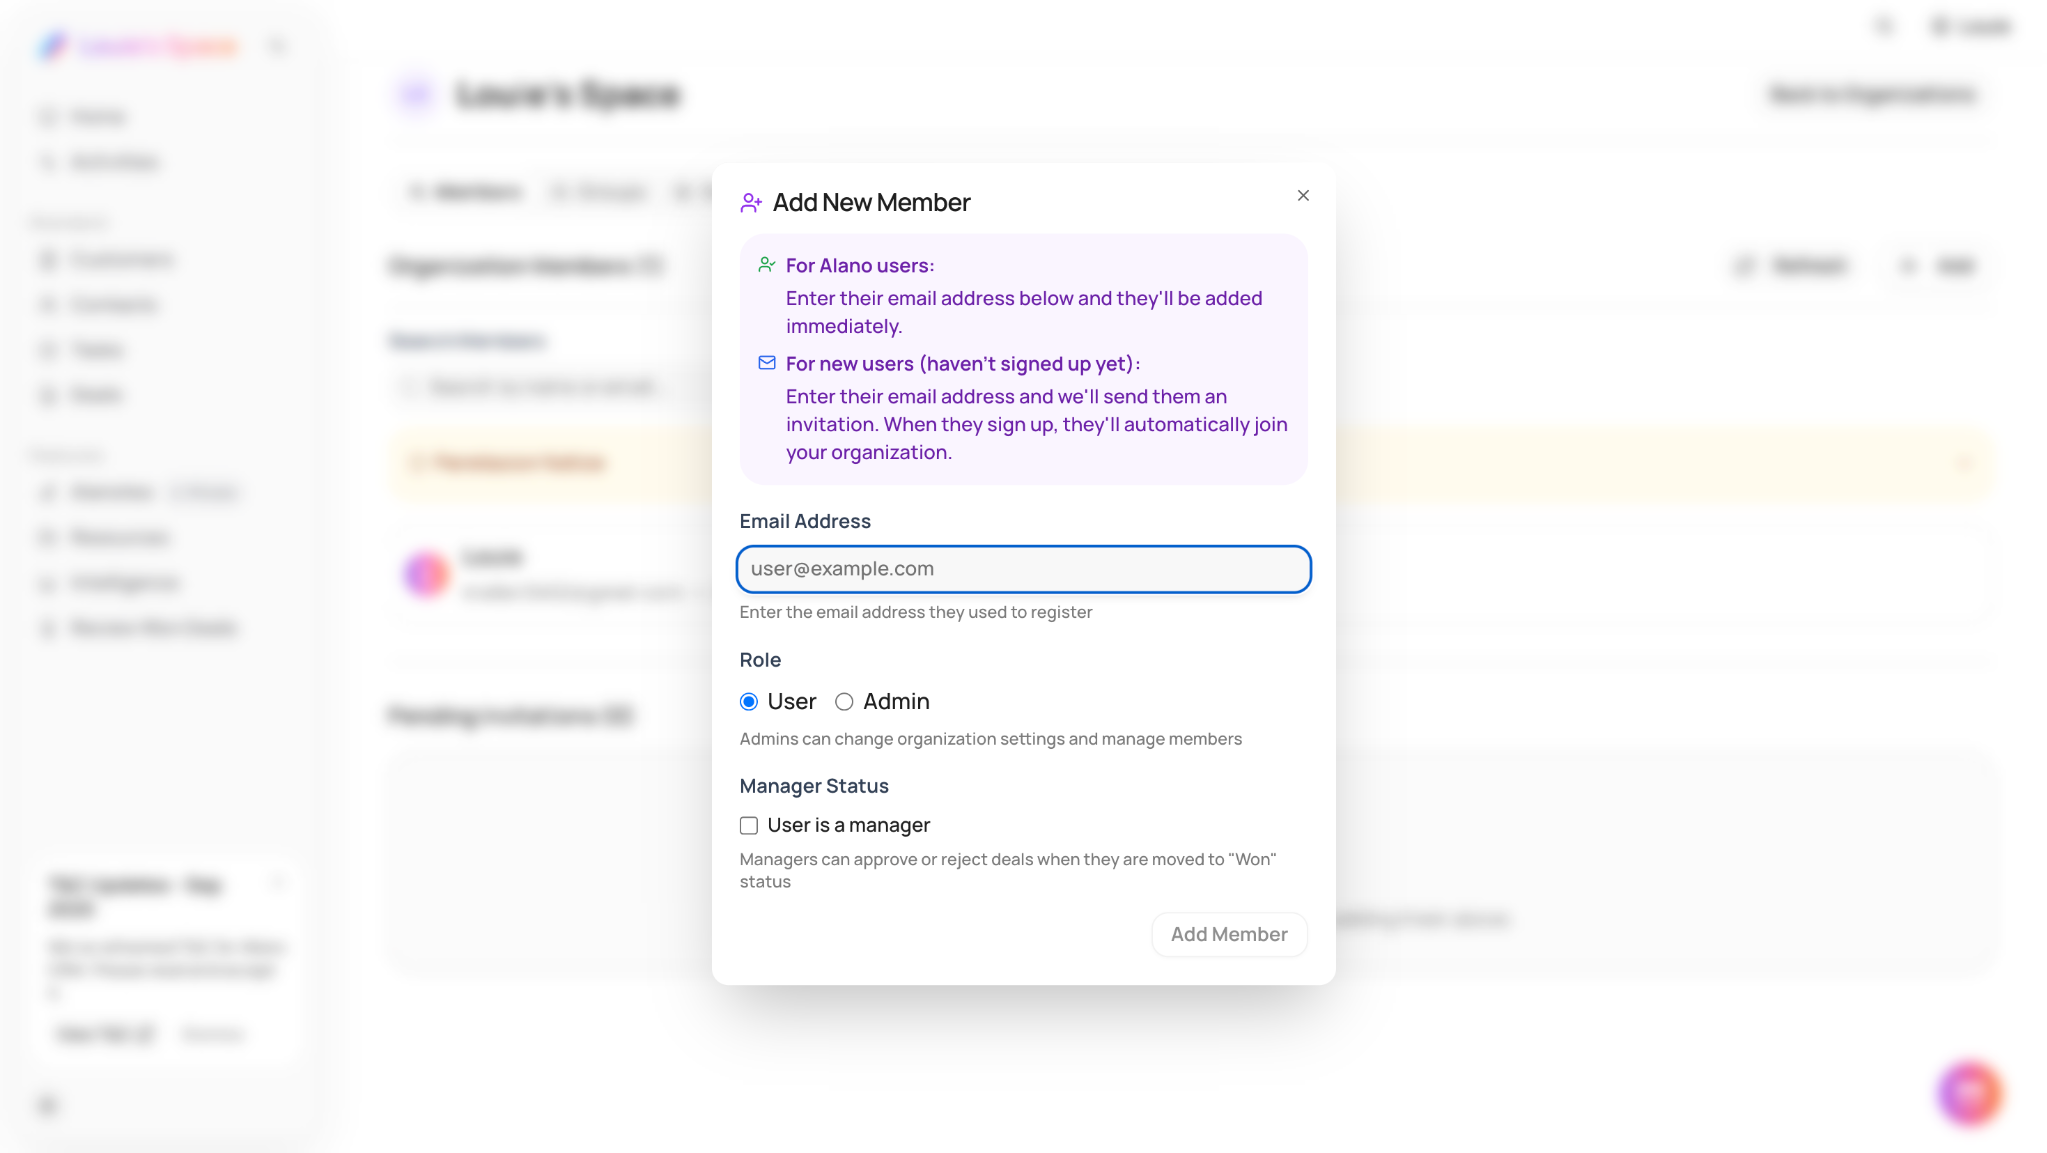
Assign roles
-
User – standard access
-
Admin – manage settings and members
-
Manager (optional) – can approve deals moved to “Won” status
Click Add Member to send the invite.
Step 5: Start collaborating
Once your organization is set up, your team can:
-
Share contacts and customers
-
Work on deals together
-
Assign and track tasks
-
Use AI-powered insights and scoring
-
Keep notes and decisions centralized
Everything updates in real time across the workspace.
Tips
-
You can switch organizations anytime using the top-left workspace switcher
-
You can create multiple organizations for different teams or clients
-
Organization logos and settings can be updated anytime