
Events auto-trigger
Flows can start automatically when a record is created or updated in your CRM, without any manual action required.
On this page
How it works
Two event-based triggers are available: Record Created fires when a new record is added, and Record Updated fires when an existing record changes. Each trigger is configured with an entity type - the type of record it watches.
When a trigger fires, it passes data to the rest of the flow. Each node is assigned an ID (e.g., node1) that you can reference in later steps using the format {{node1.field_name}}.
Record Created vs Record Updated
-
Record Created - fires when a new record is created for the selected entity. You can optionally add JSON filters to narrow which records trigger the flow.
-
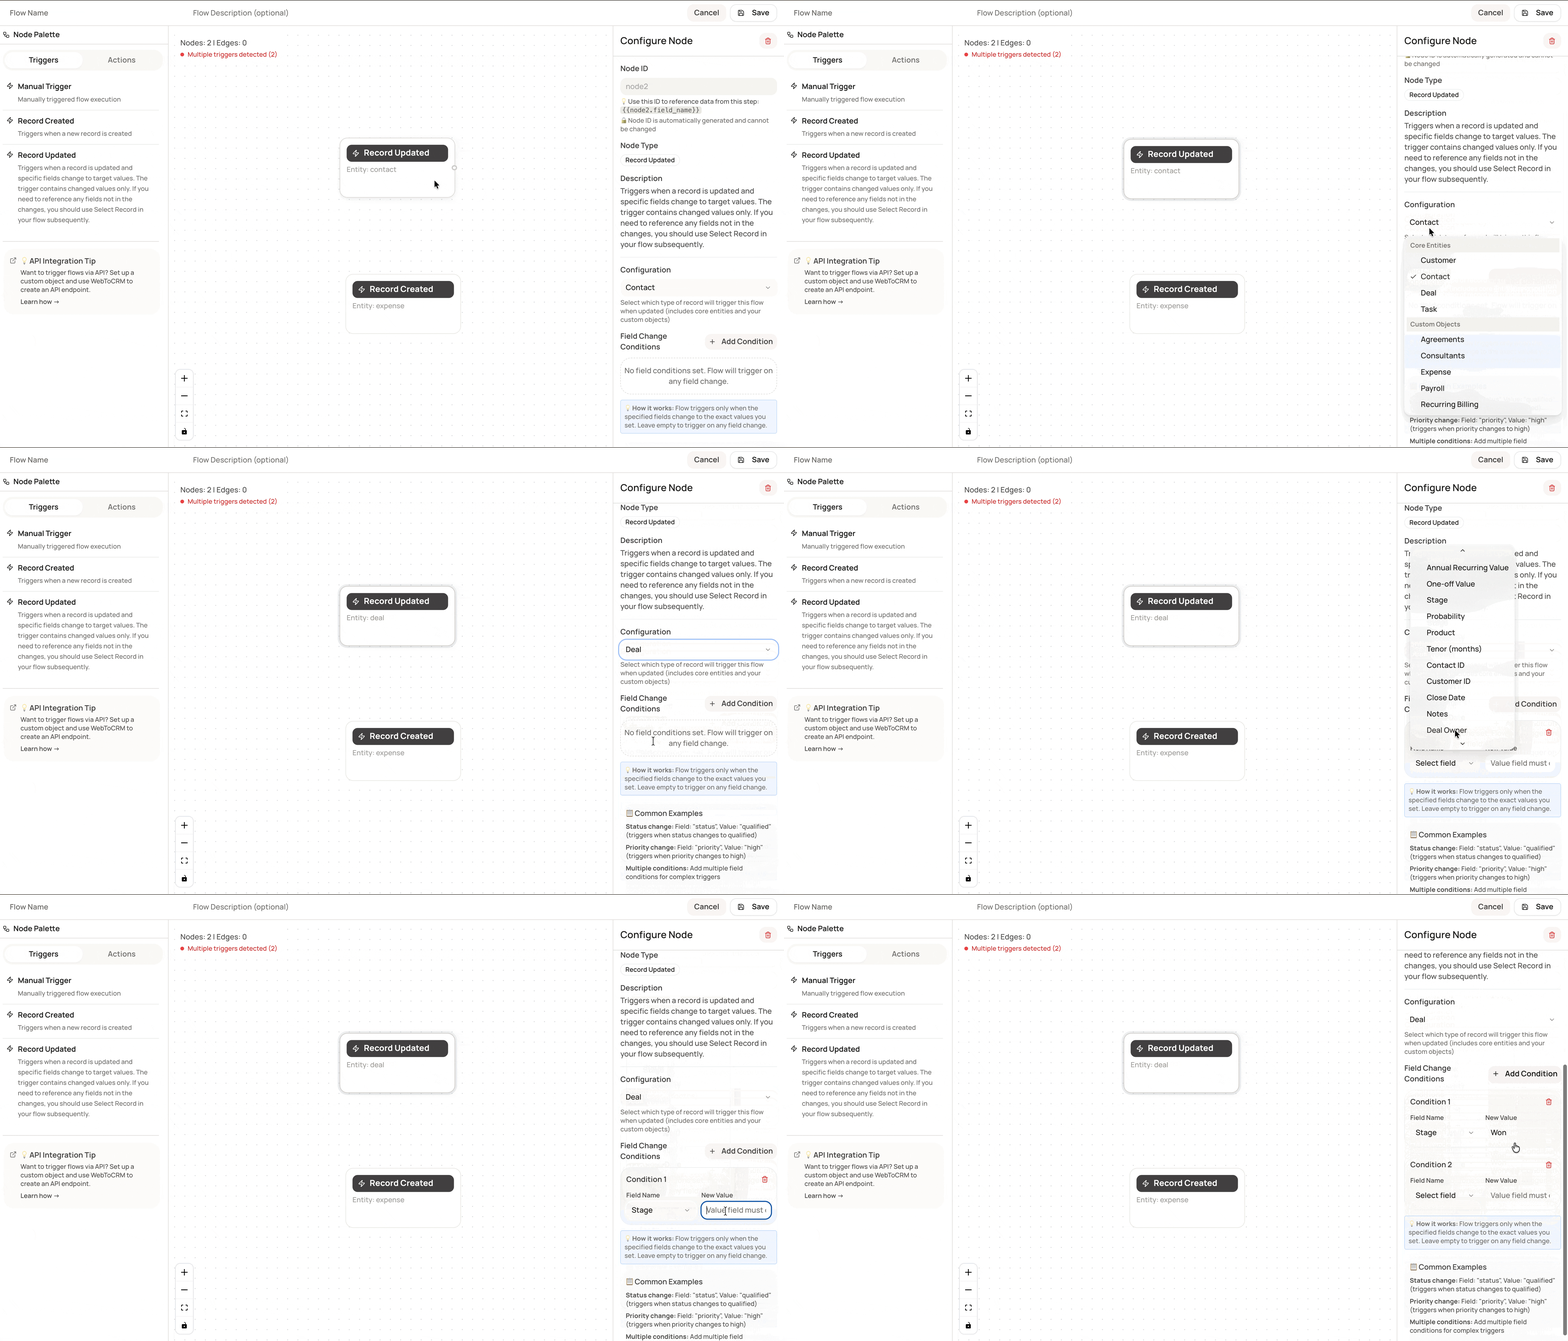
Record Updated - fires when specific fields on a record change to target values. You set Field Change Conditions (field + new value pairs) to control exactly when the trigger fires. Leave conditions empty to trigger on any field change.
Record Updated only passes the changed fields to the flow — not the full record. If your flow needs fields that were not part of the change, add a Select Record action immediately after the trigger to retrieve the complete record.
How to set up an event-triggered flow
Step 1: Open or create a flow
-
Go to Settings
-
Click Flows
-
Open an existing flow or click Create Flow
Step 2: Add an event trigger
-
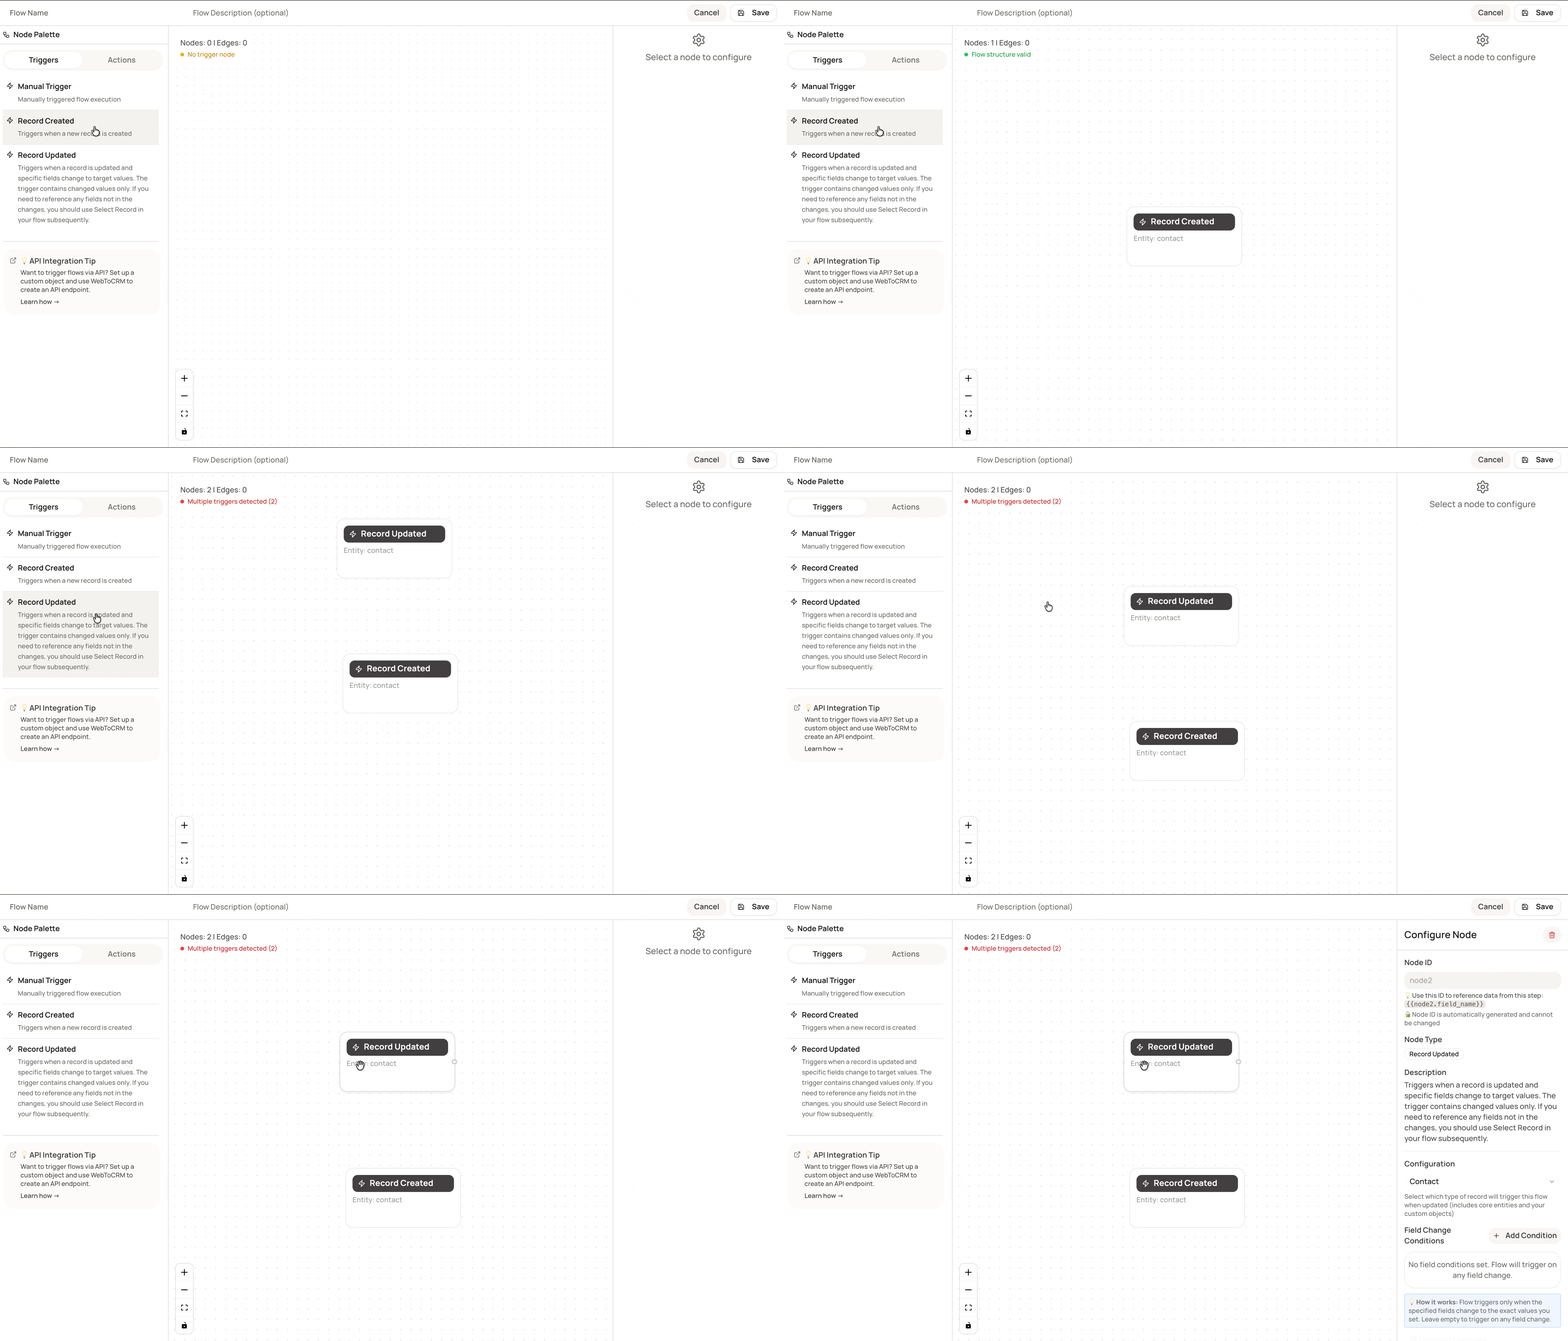
In the Node Palette, select the Triggers tab
-
Click Record Created or Record Updated to add it to the canvas
-
Click the trigger node to open its configuration in the right panel
Step 3: Configure the trigger
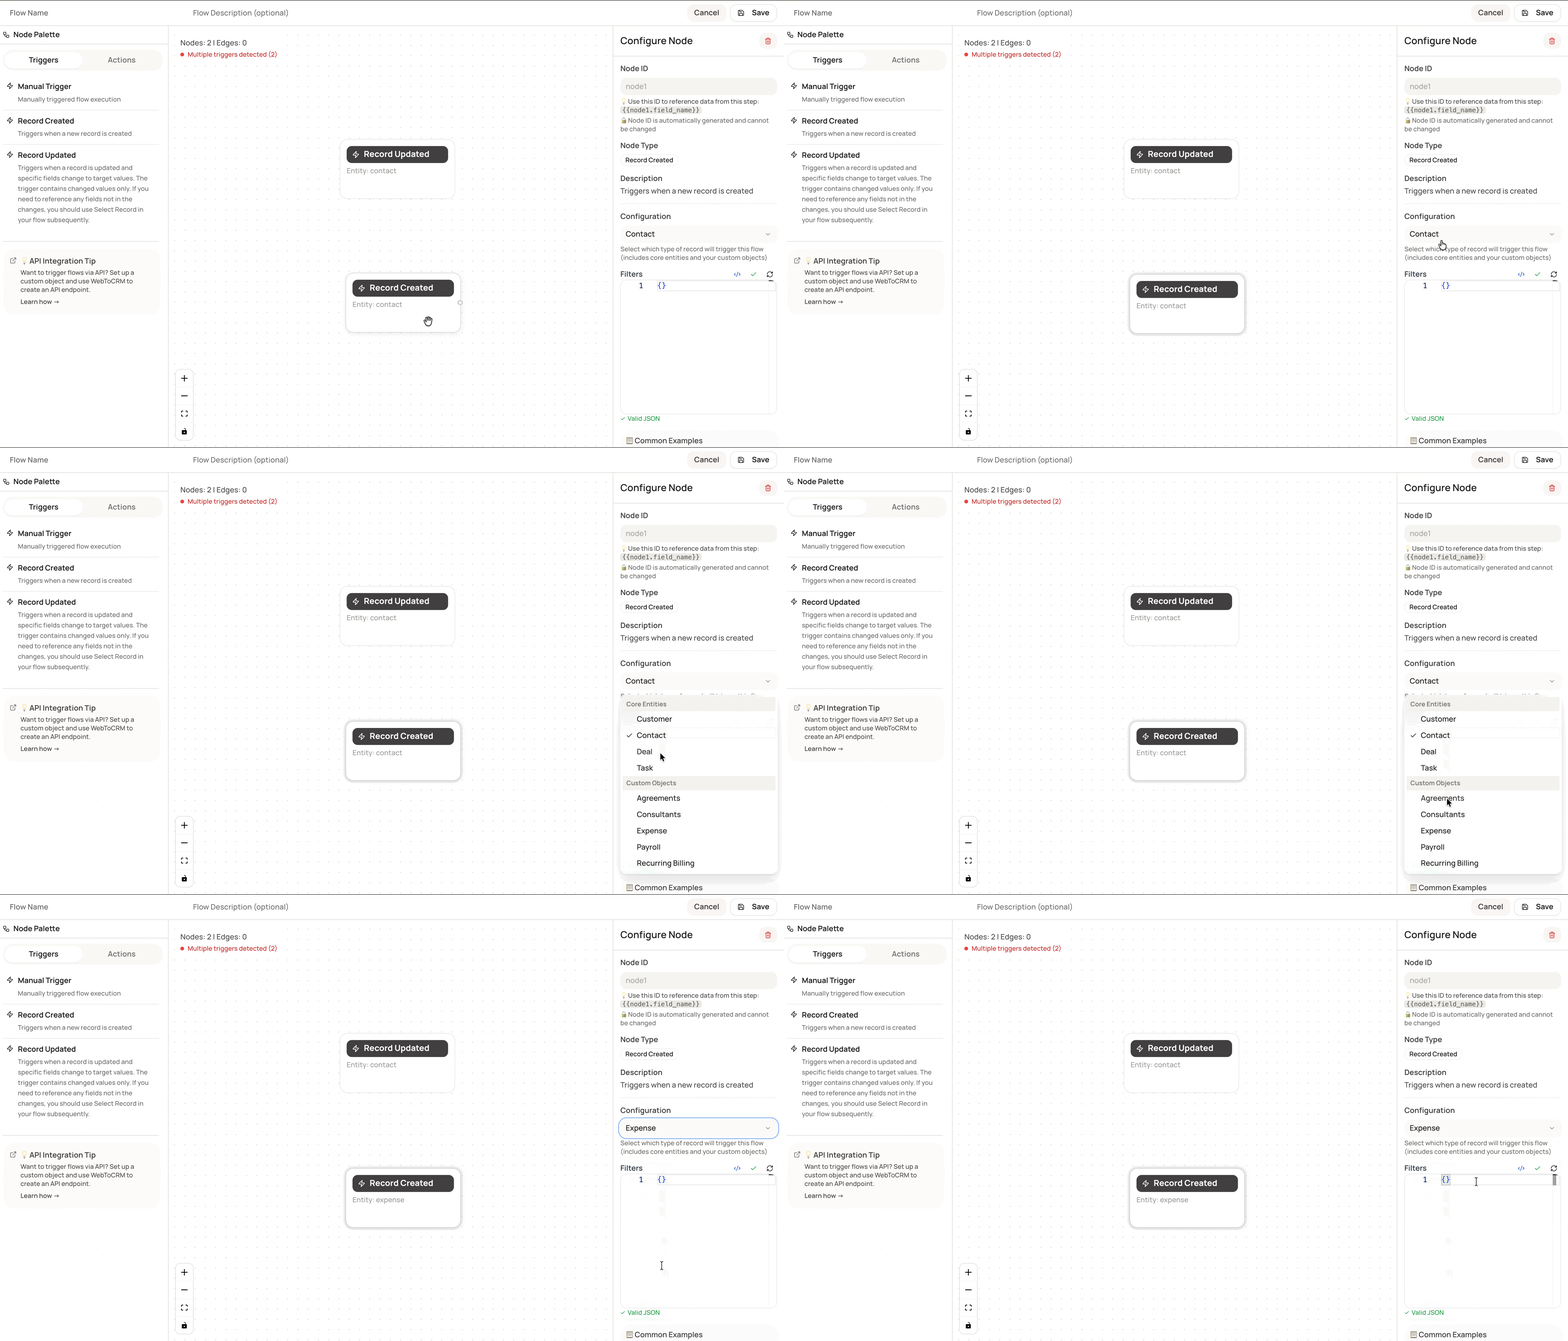
For Record Created:
-
Select the Entity Type - the record type that will start the flow (e.g., Contact, Customer, or any custom object)
-
Add JSON filters (optional) to narrow which records trigger the flow
For Record Updated:
-
Select the Entity Type - the record type to watch for changes
-
Under Field Change Conditions, click + Add Condition
-
Set the Field Name and New Value that should fire the trigger
-
Leave conditions empty to trigger on any field change to that entity
Step 4: Add actions and save
-
Switch to the Actions tab and add the action nodes your flow needs
-
Connect nodes in sequence on the canvas
-
Click Save
-
Each flow can only have one trigger node — the canvas shows a warning if more than one is detected
-
Record Updated only contains changed field values. Add a Select Record action after the trigger if the flow needs the full record
-
Reference data from any node in later steps using
{{nodeID.field_name}}(e.g.,{{node1.contact_id}})