
Discount Tiers
Discount Tiers let you define discount ranges, approval groups, and priority rules for controlled pricing across your organization.
On this page
How it works
Each tier sets a discount range (min% to max%) and assigns an approval group. When a team member requests a discount, the system checks which tier the amount falls into and automatically routes the request to the corresponding group.
A few rules govern how tiers are applied:
-
Priority determines which tier is used when ranges overlap - lower numbers mean higher priority (Priority 1 overrides Priority 2)
-
Overlapping ranges are allowed; use priority to control which tier takes precedence
-
SKUs can override tier matching to always route to a specific approval group, regardless of the discount amount
How to create a Discount Tier
Step 1: Open Discount Tiers
-
Go to Settings
-
Enable Price Control and click Configure Price Control
-
Select the Discount Tiers tab
-
Click + Add Tier
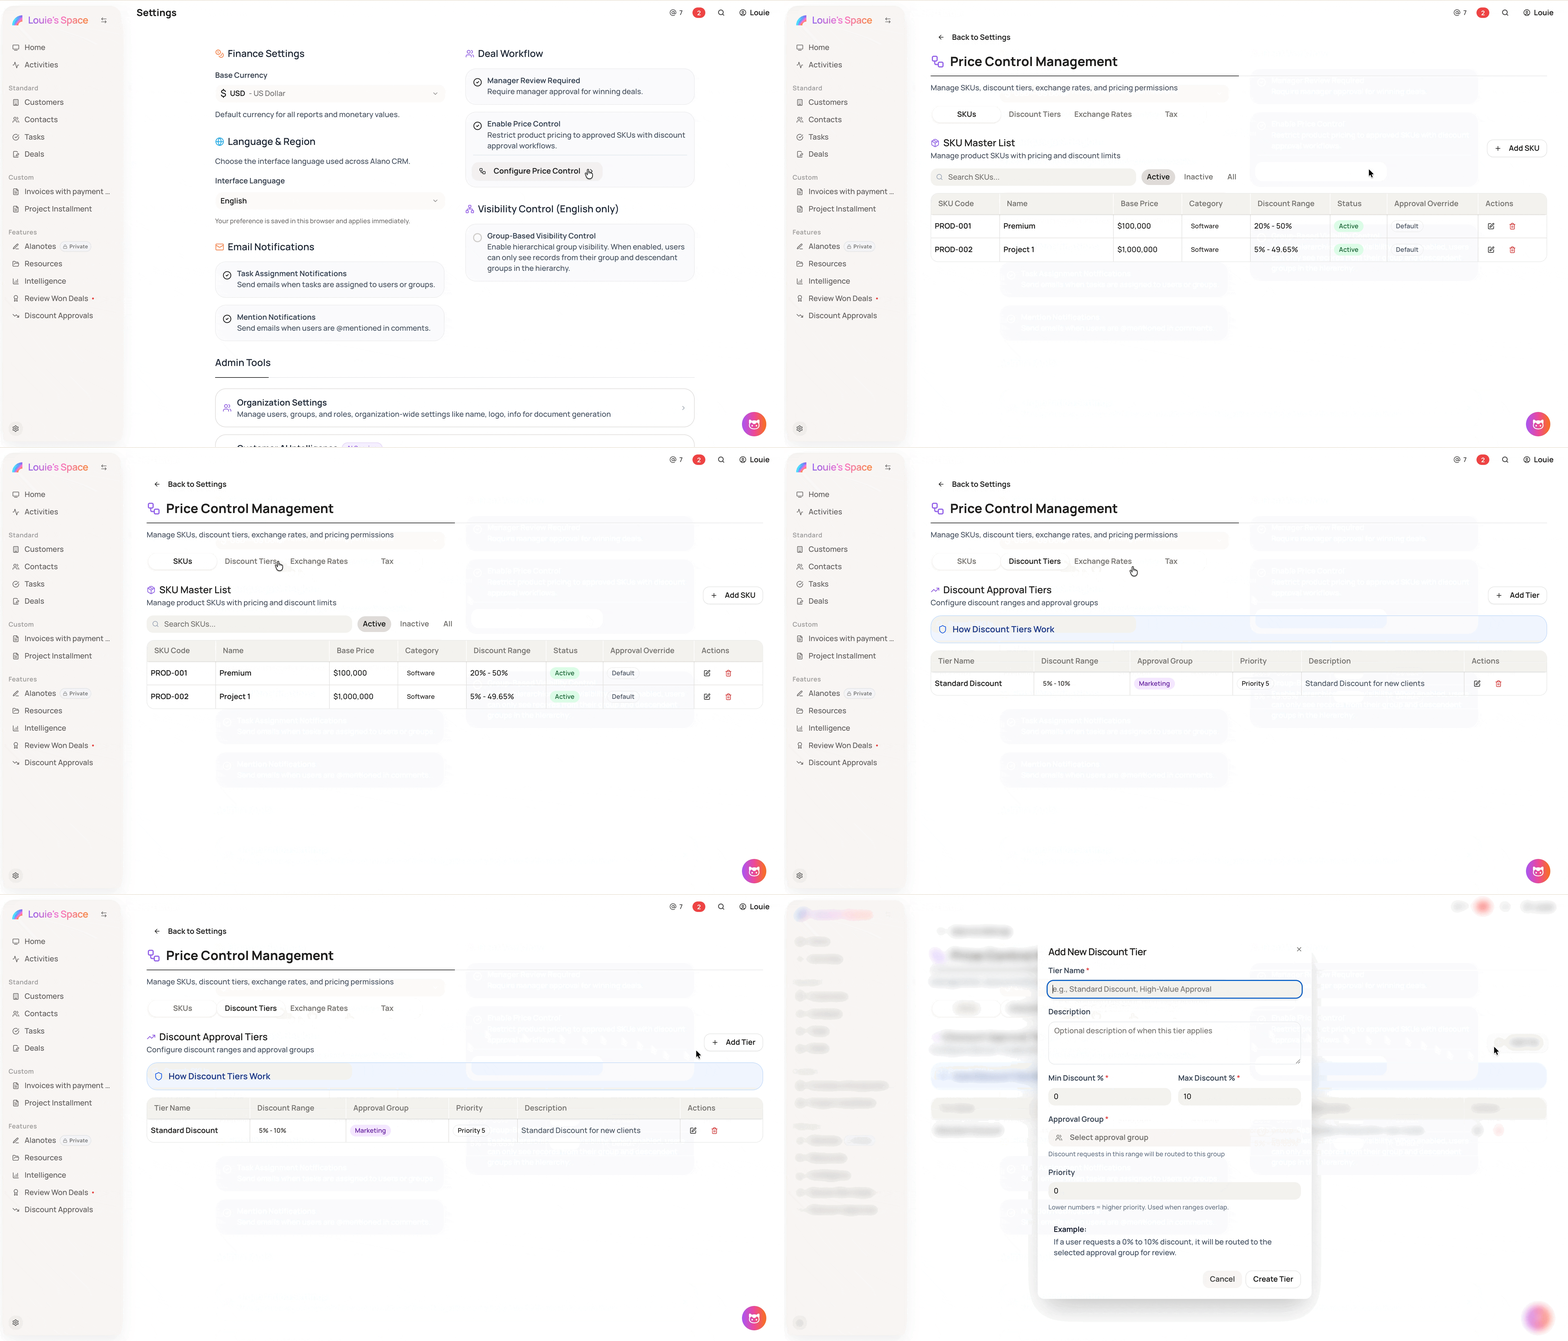
Step 2: Fill in the tier details
-
Tier Name - a descriptive name for this tier (e.g., Standard Discount, High-Value Approval)
-
Description - optional notes on when this tier applies
-
Min Discount % and Max Discount % - the discount range this tier covers
-
Approval Group -the group responsible for reviewing and approving requests within this range
-
Priority - lower numbers take precedence when ranges overlap
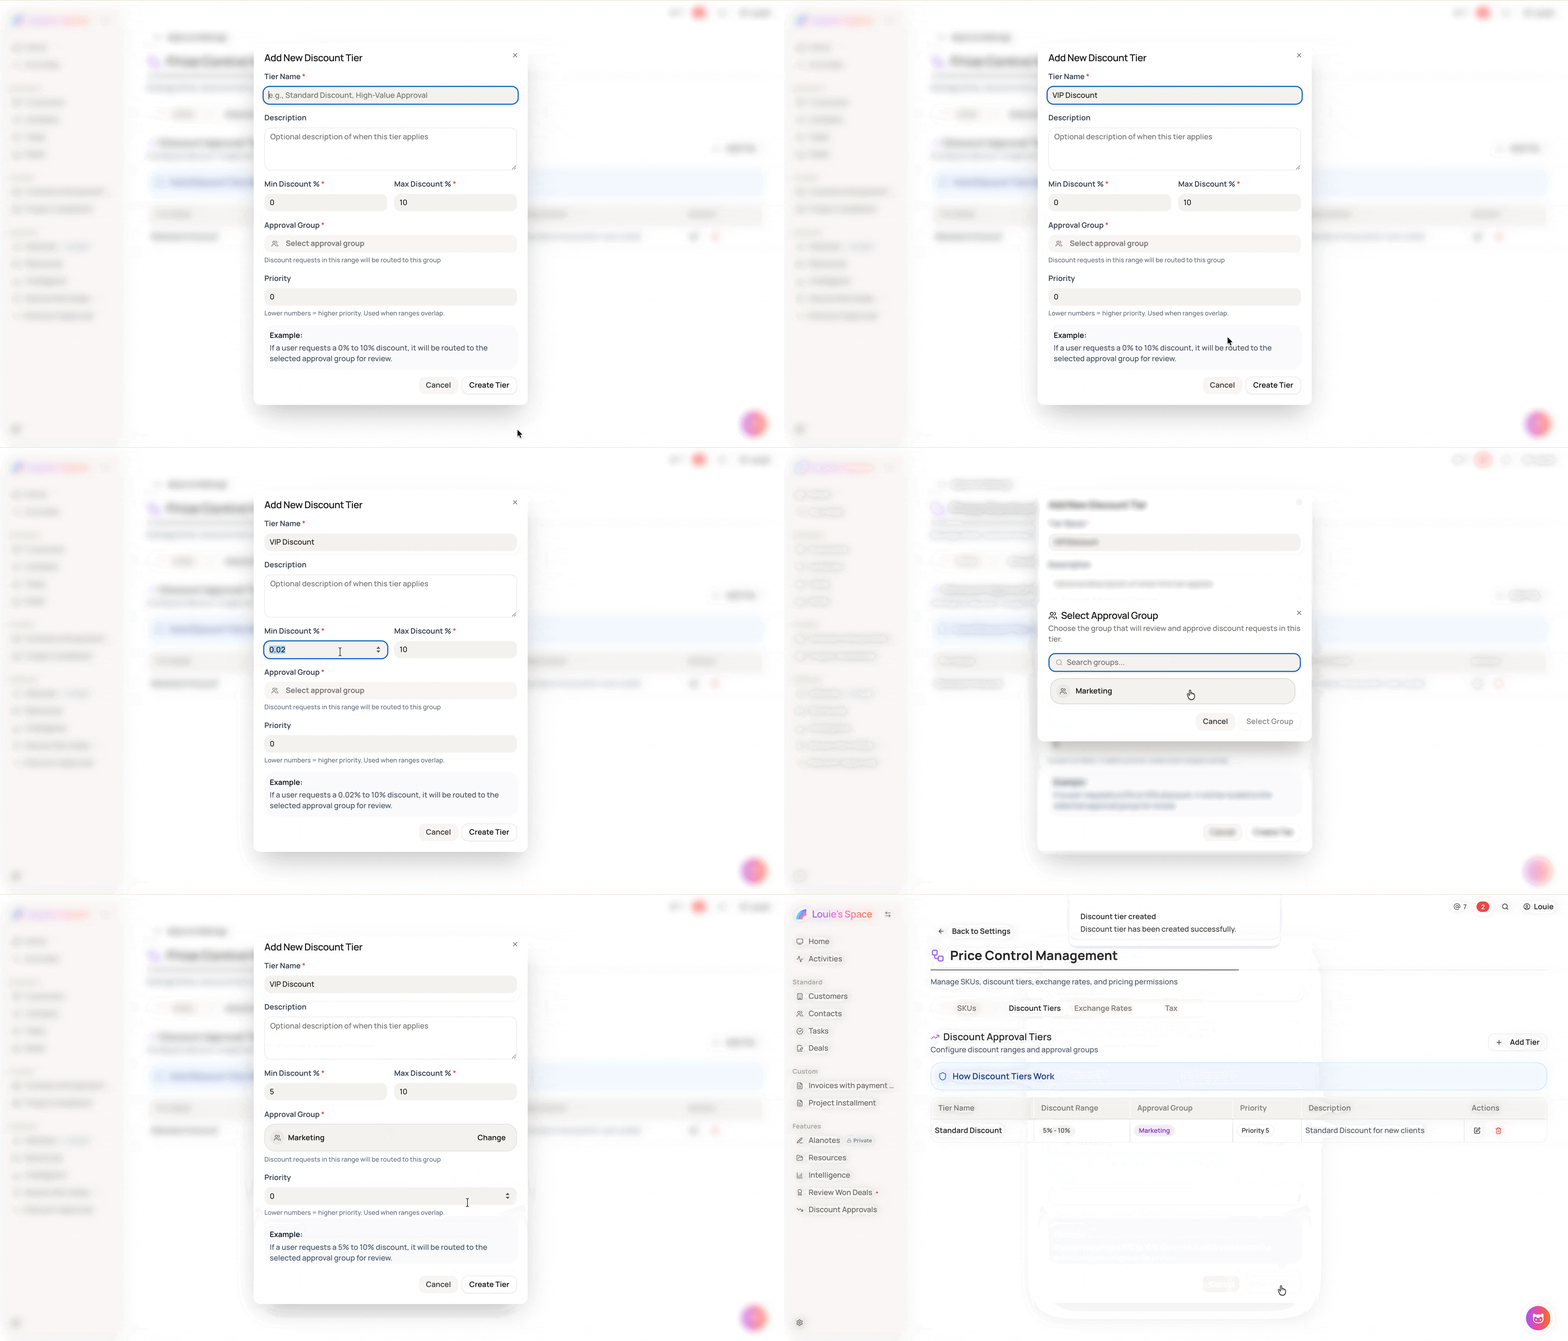
Step 3: Create the tier
Click Create Tier to save.
-
Discount requests are routed to the correct approval group automatically based on the range they fall within
-
If a SKU has a specific approval group assigned, it overrides the tier matching entirely
-
You can edit or delete existing tiers at any time from the Discount Tiers list